Guide to build a Pipeline using Pipeline Builder
This document captures step-by-step instructions to build a pipeline using Pipeline Builder.
-
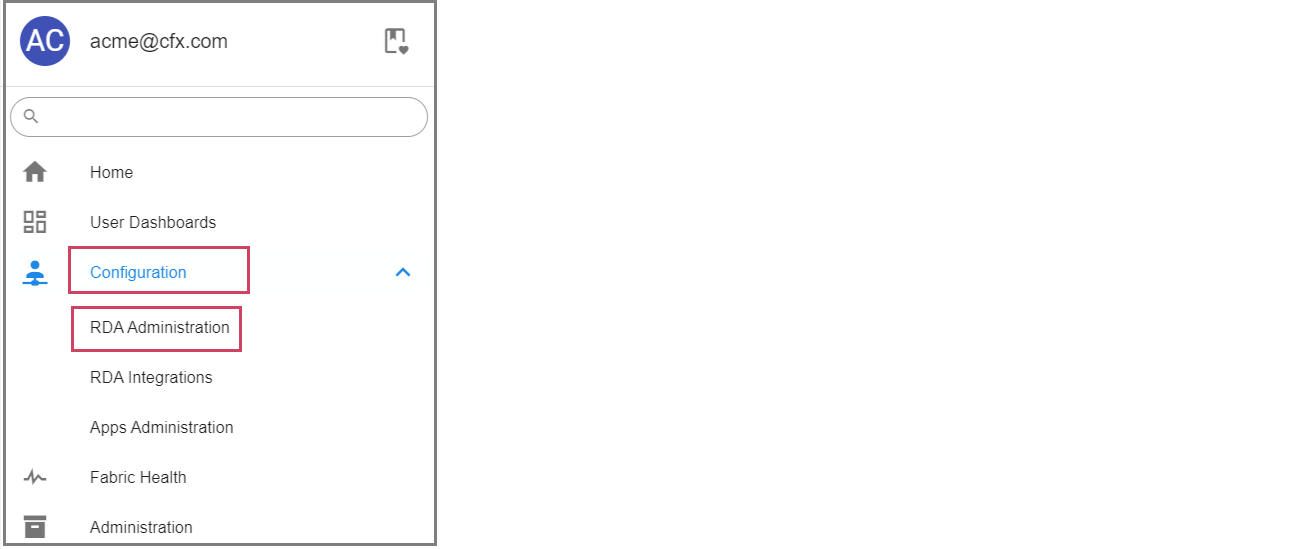
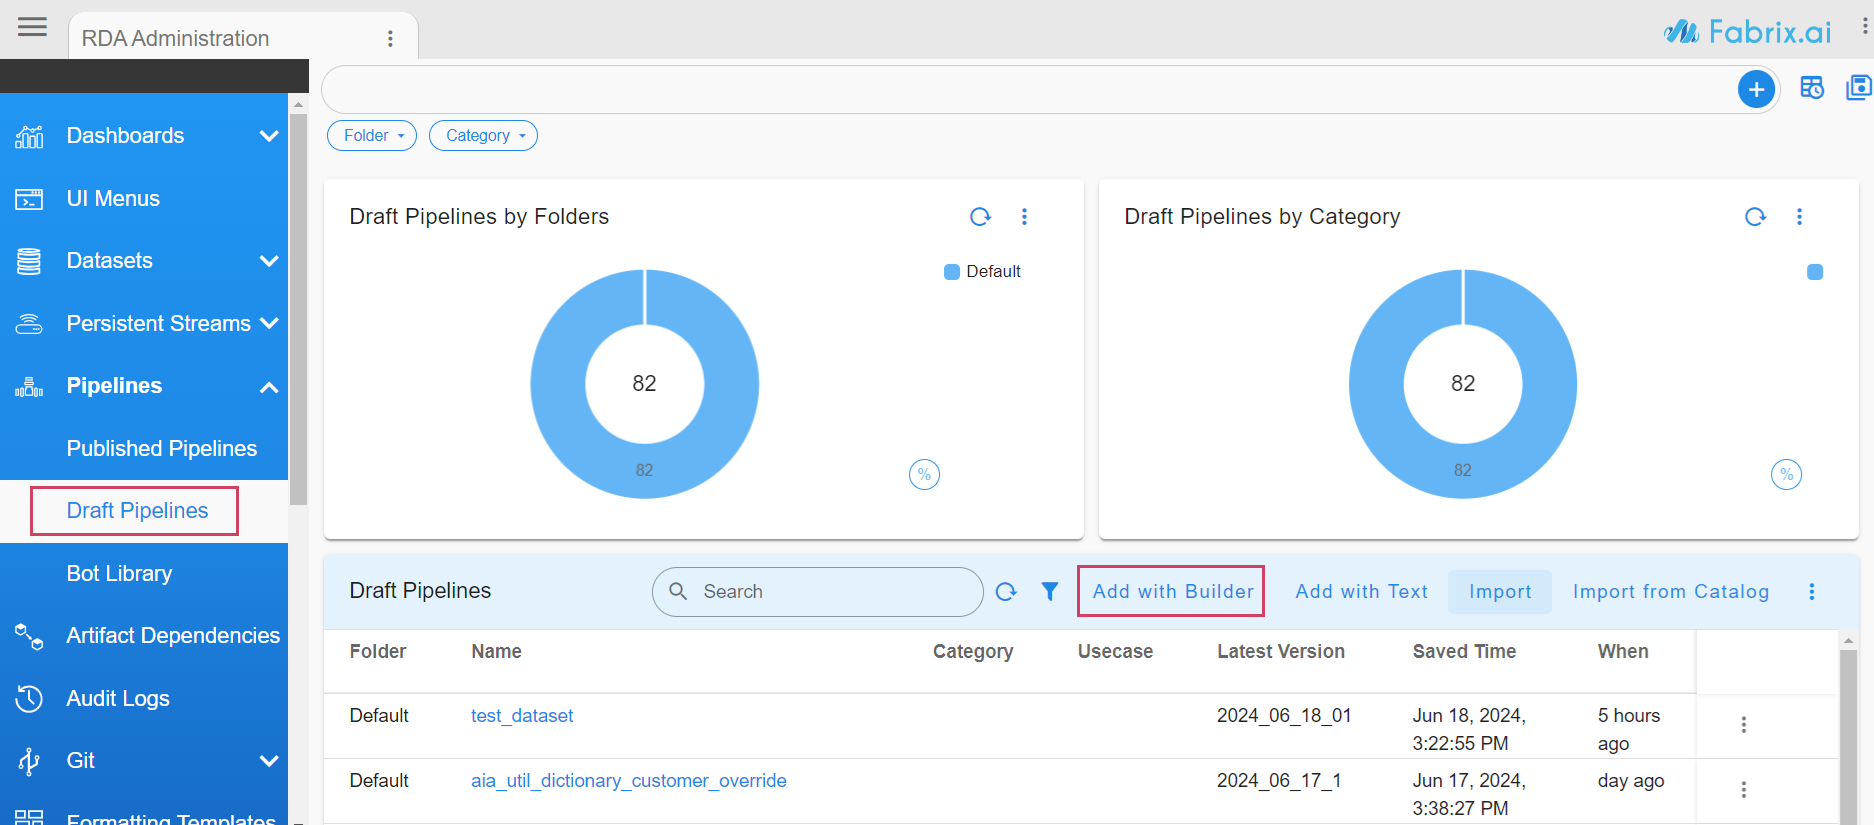
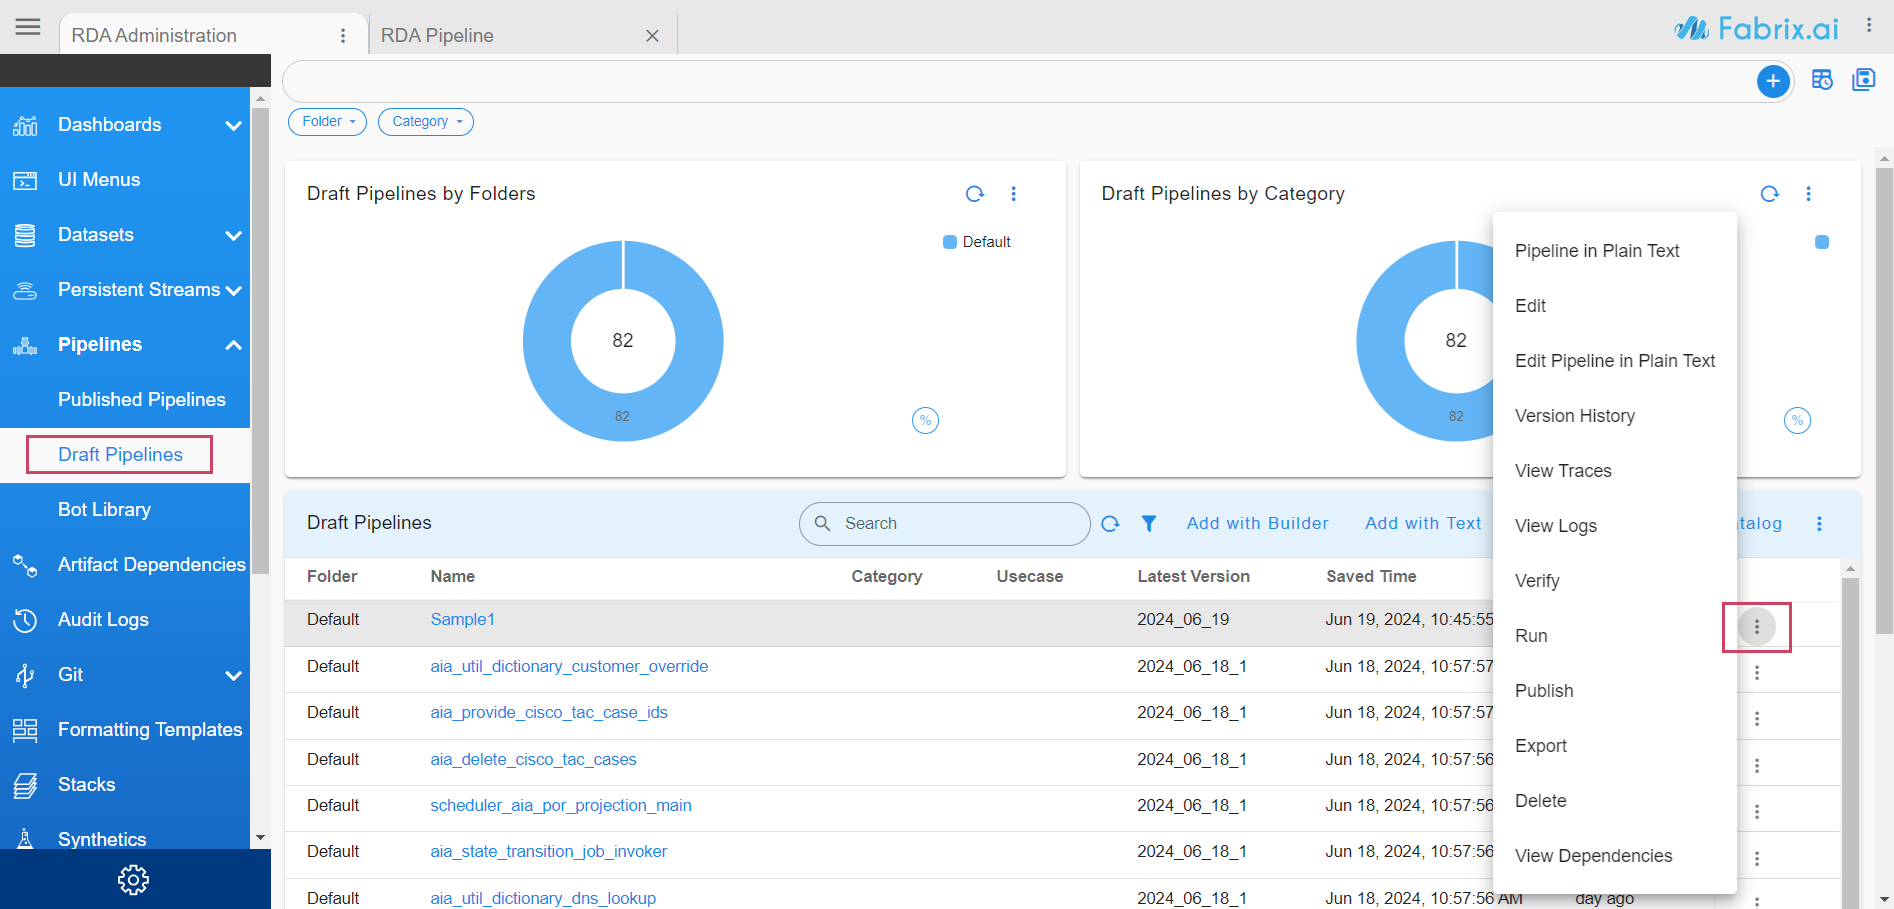
Go to Home Menu -> Click Configuration -> Rda Administration -> Click Pipelines -> Click Draft Pipelines -> Select Add With Builder
-
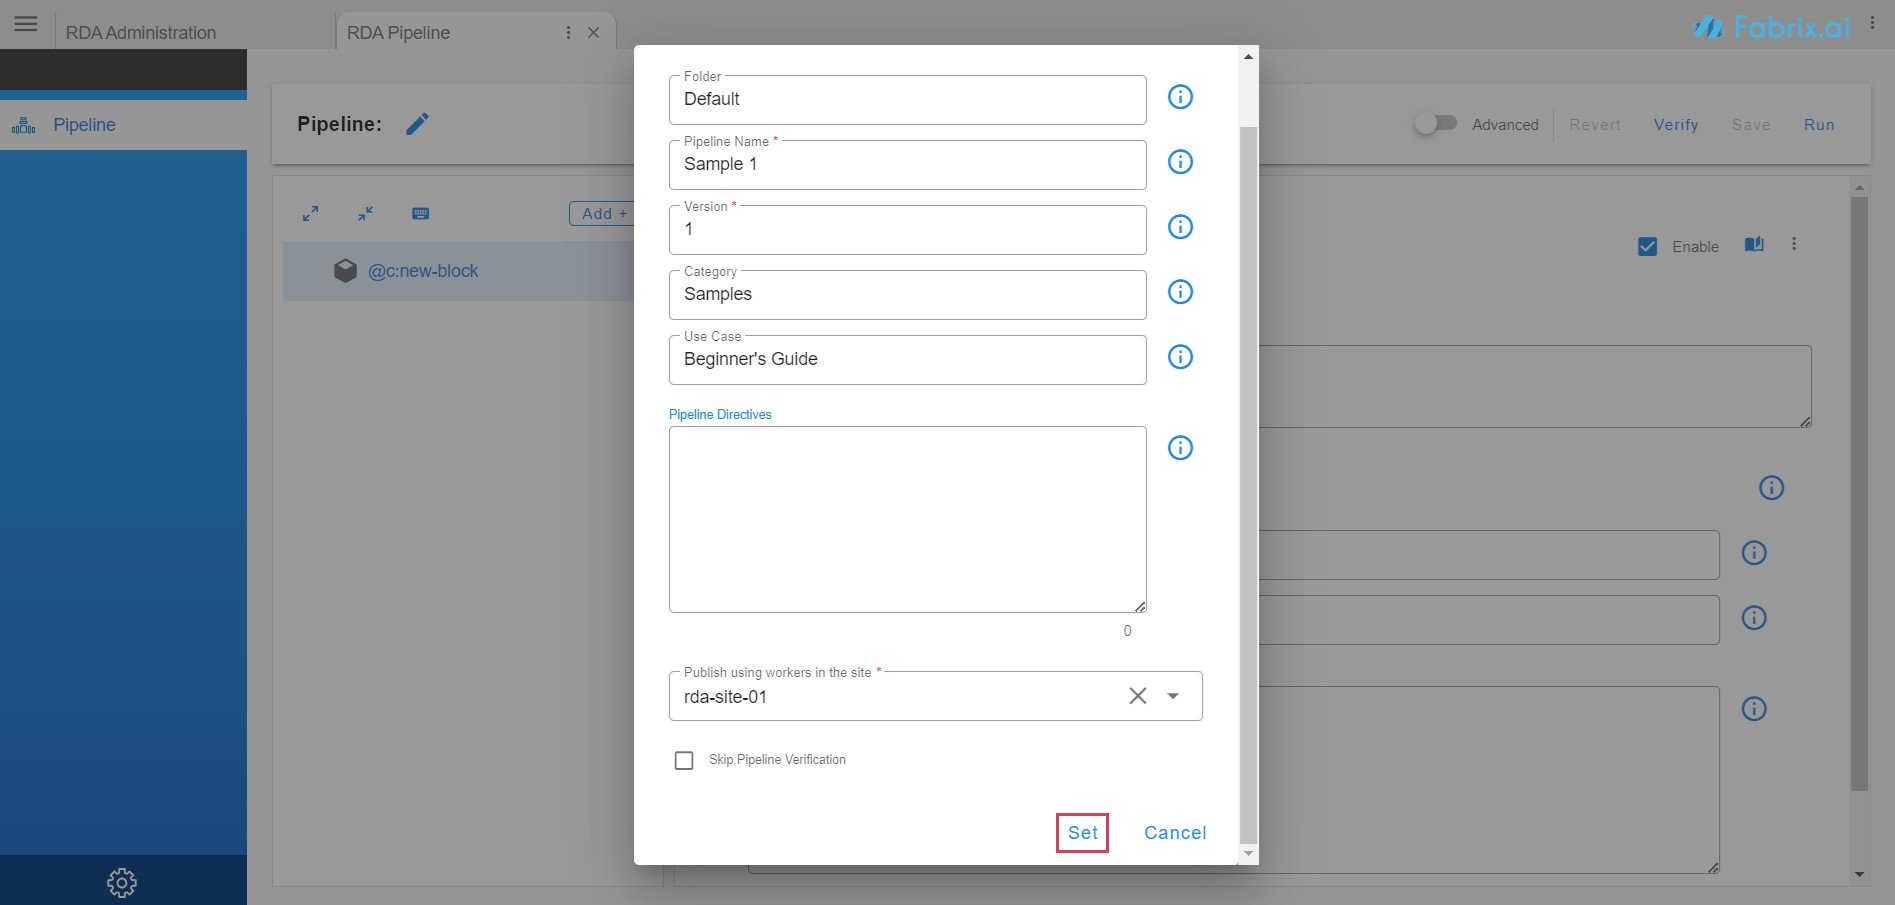
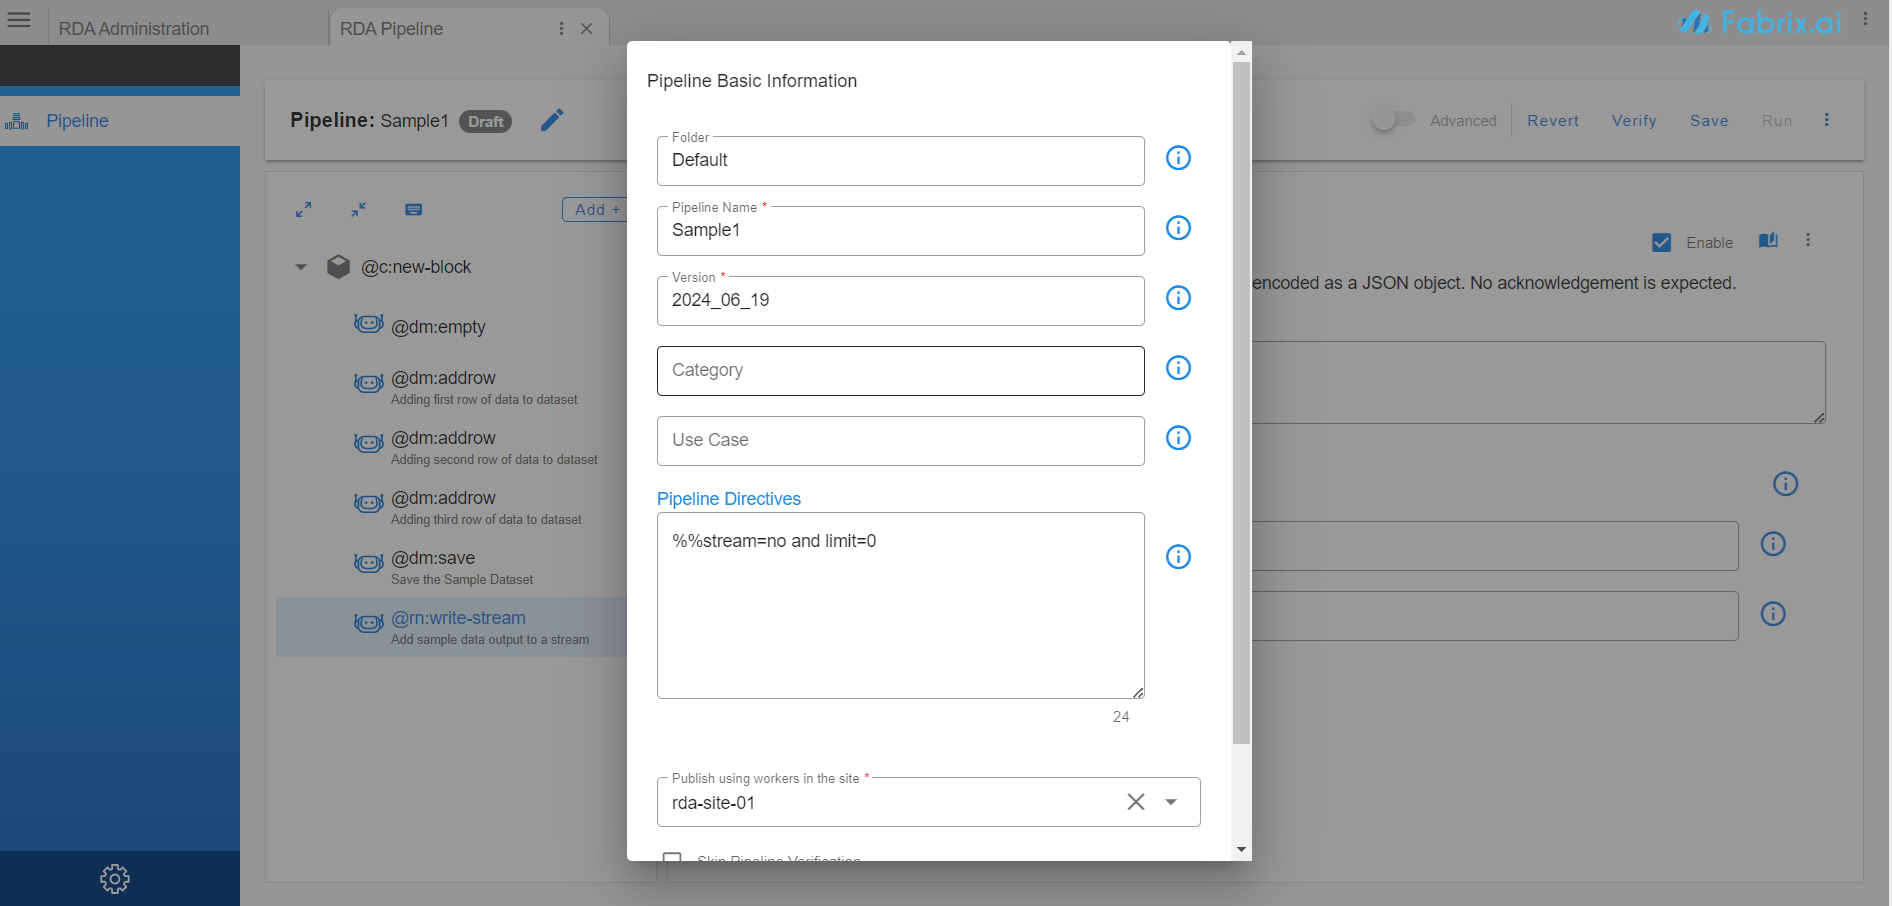
Enter pipeline Select the Folder add basic information like Pipeline Name, Version, Category & Use Case. User can save variations of a pipeline as different versions. Select a worker to run or publish the pipeline. Click on Set. This information can be changed later from the top pane Edit button
-
Once basic information is saved, let's create a simple pipeline to create a dataset and save it in our Object Storage.
-
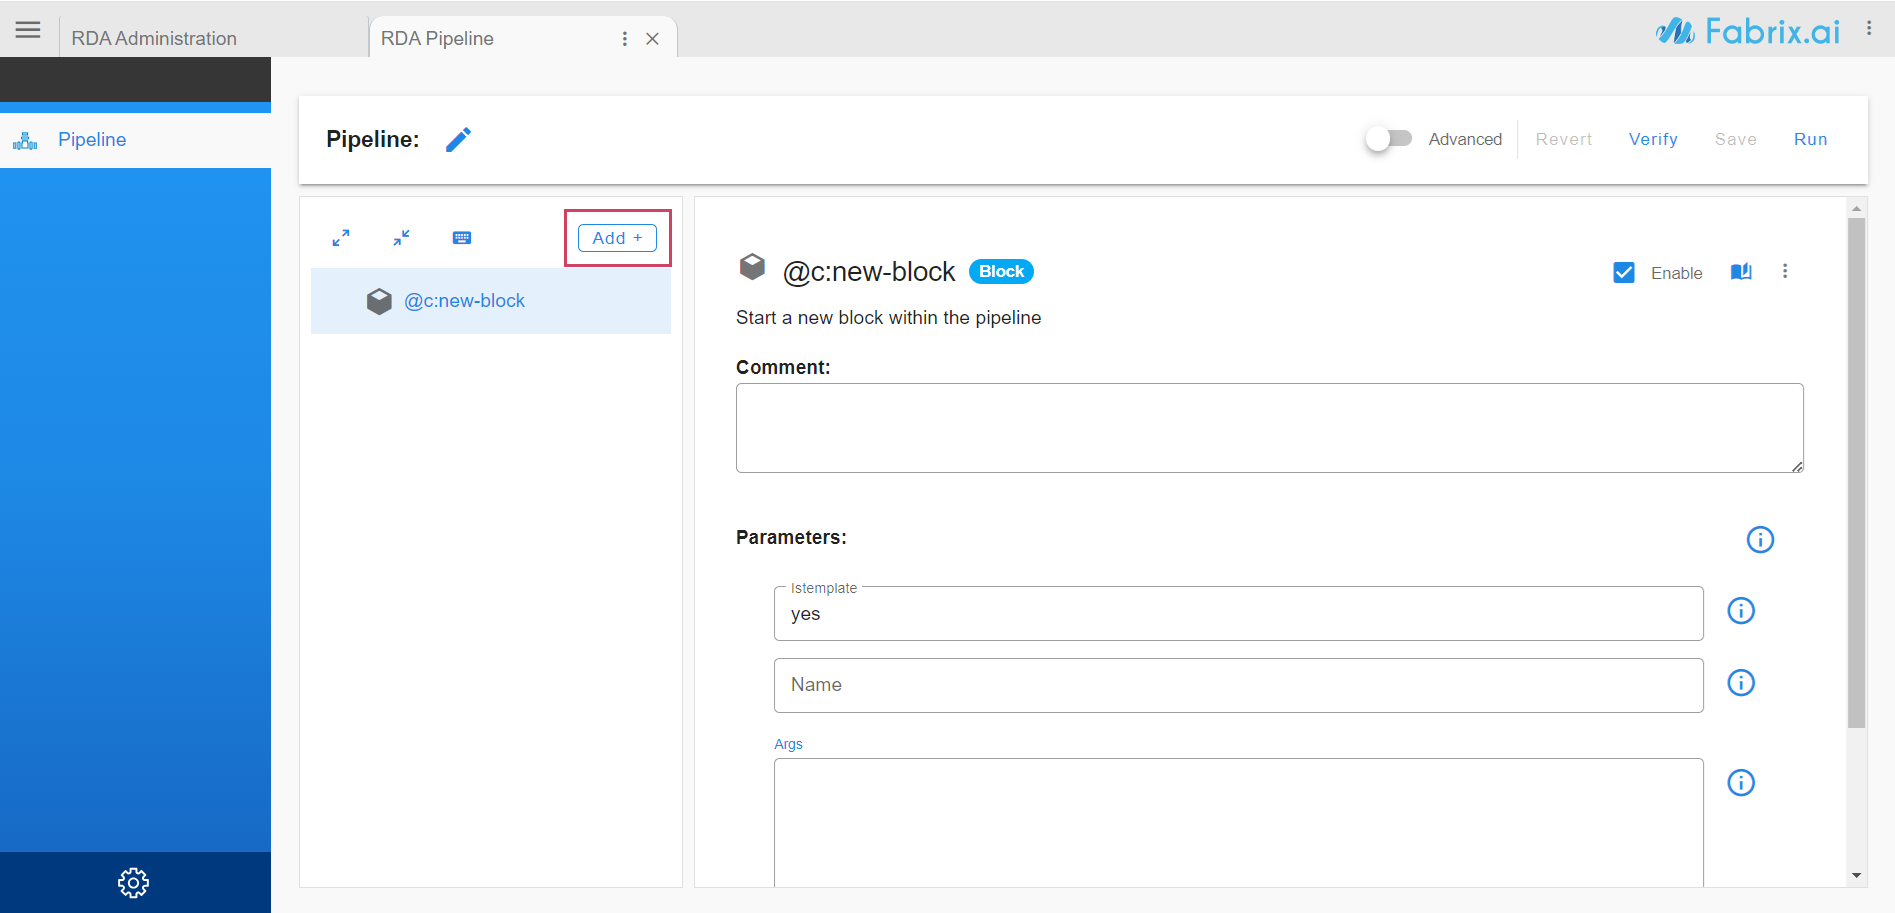
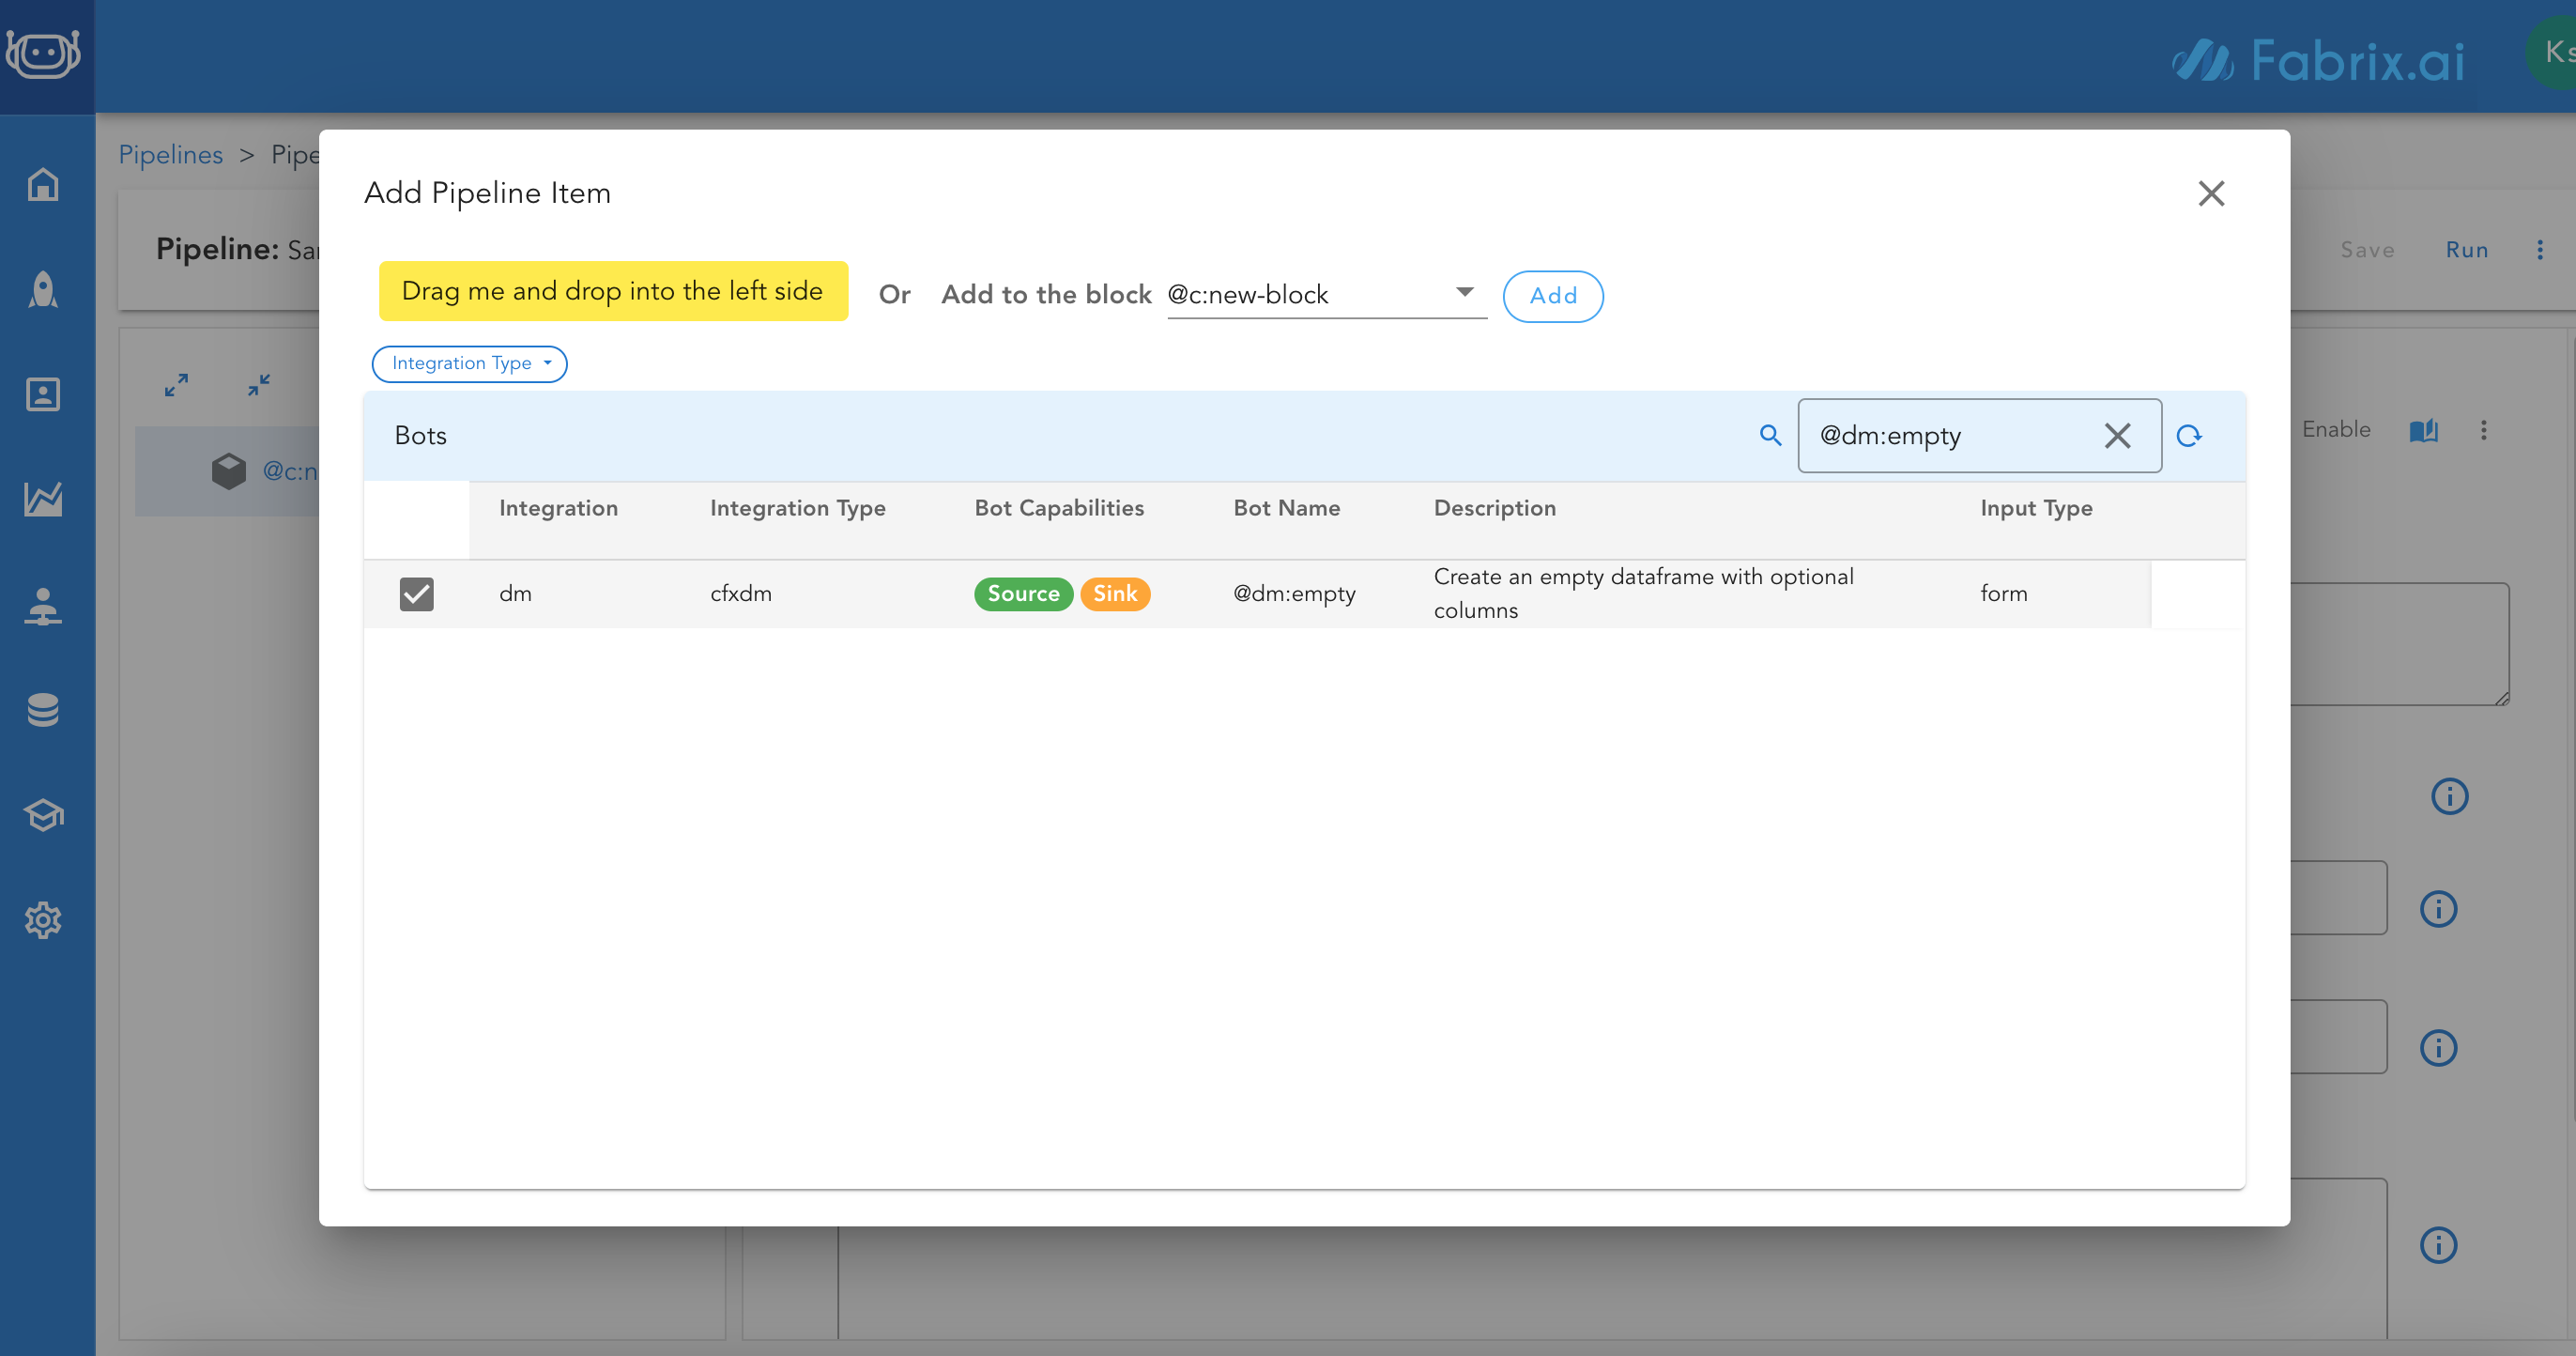
Click on Add+ on left pane to add a bot to pipeline
-
Search for bot that we want to add. In our case we are creating an empty dataset and adding rows to it, so first bot we look for is
@dm:emptywhich creates an empty dataset -
Select block where new bot needs to be added or Drag and drop it into the left side
-
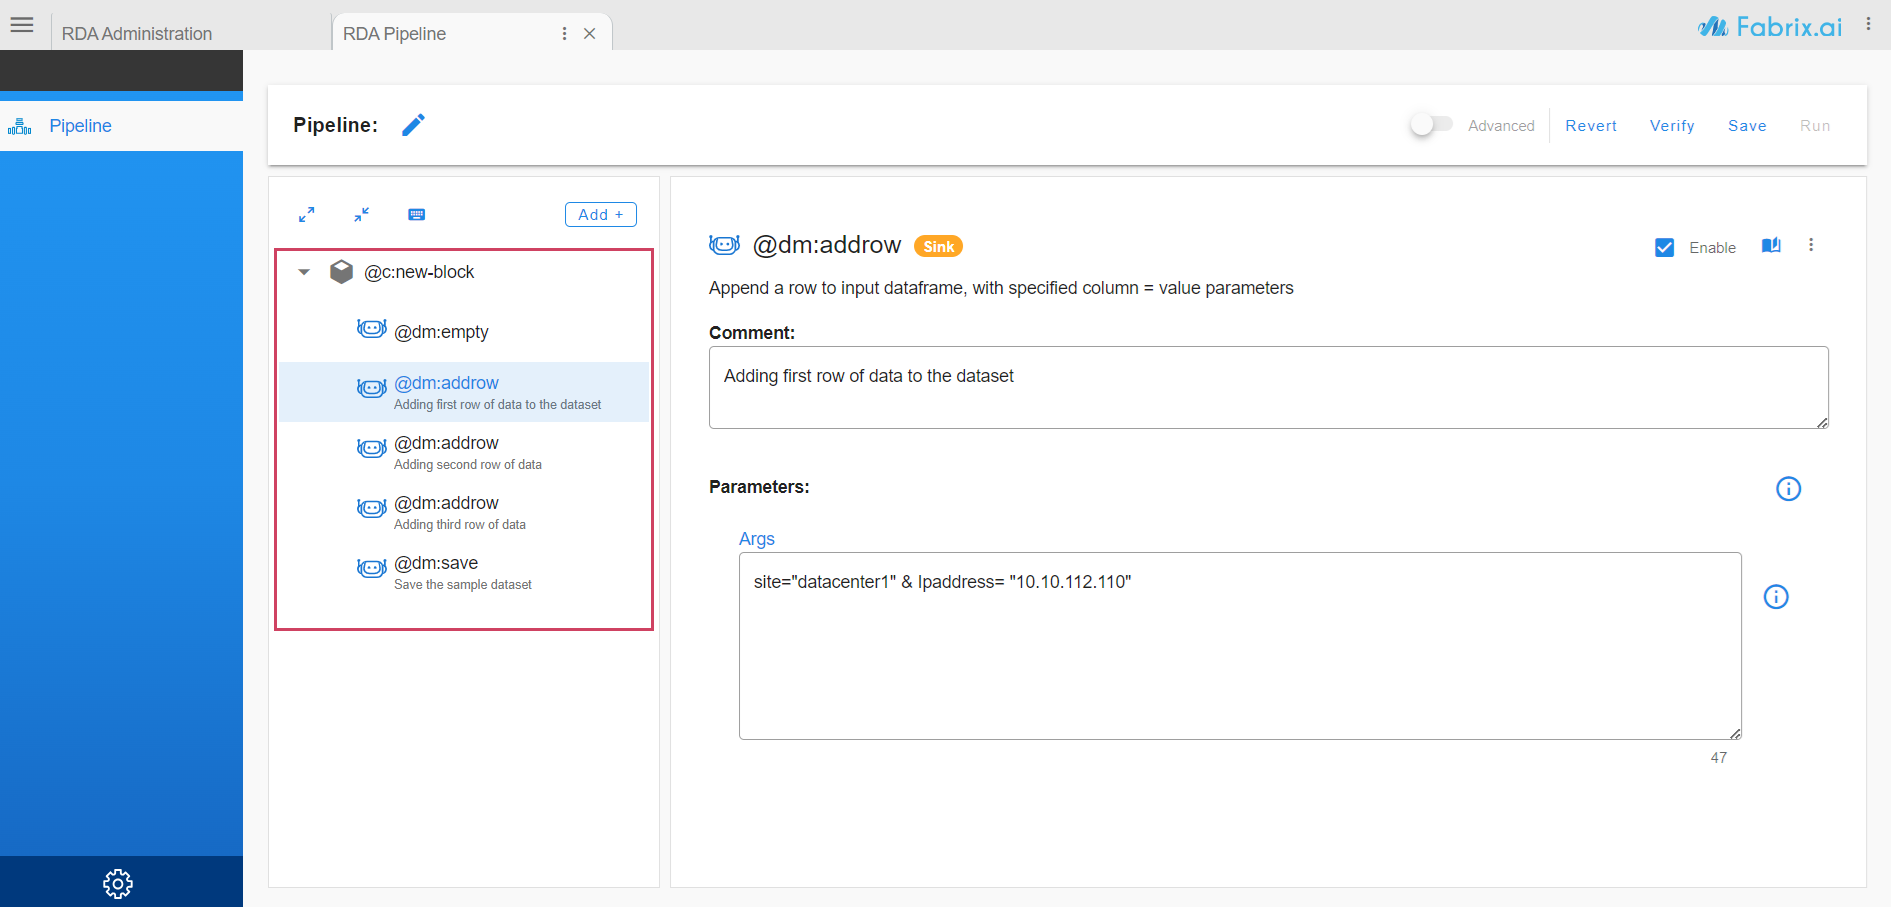
Next lets add some data to the dataset using a new bot
@dm:addrow. This allows us to add a new row to the dataset with column=value parameters. -
Enter bot specific information on the right pane
-
Click on Clone action on the top right side of the pane to clone the bot to add more rows of data to the dataset
-
Click on Delete action on the top right side of the pane to delete any bot from the pipeline.
-
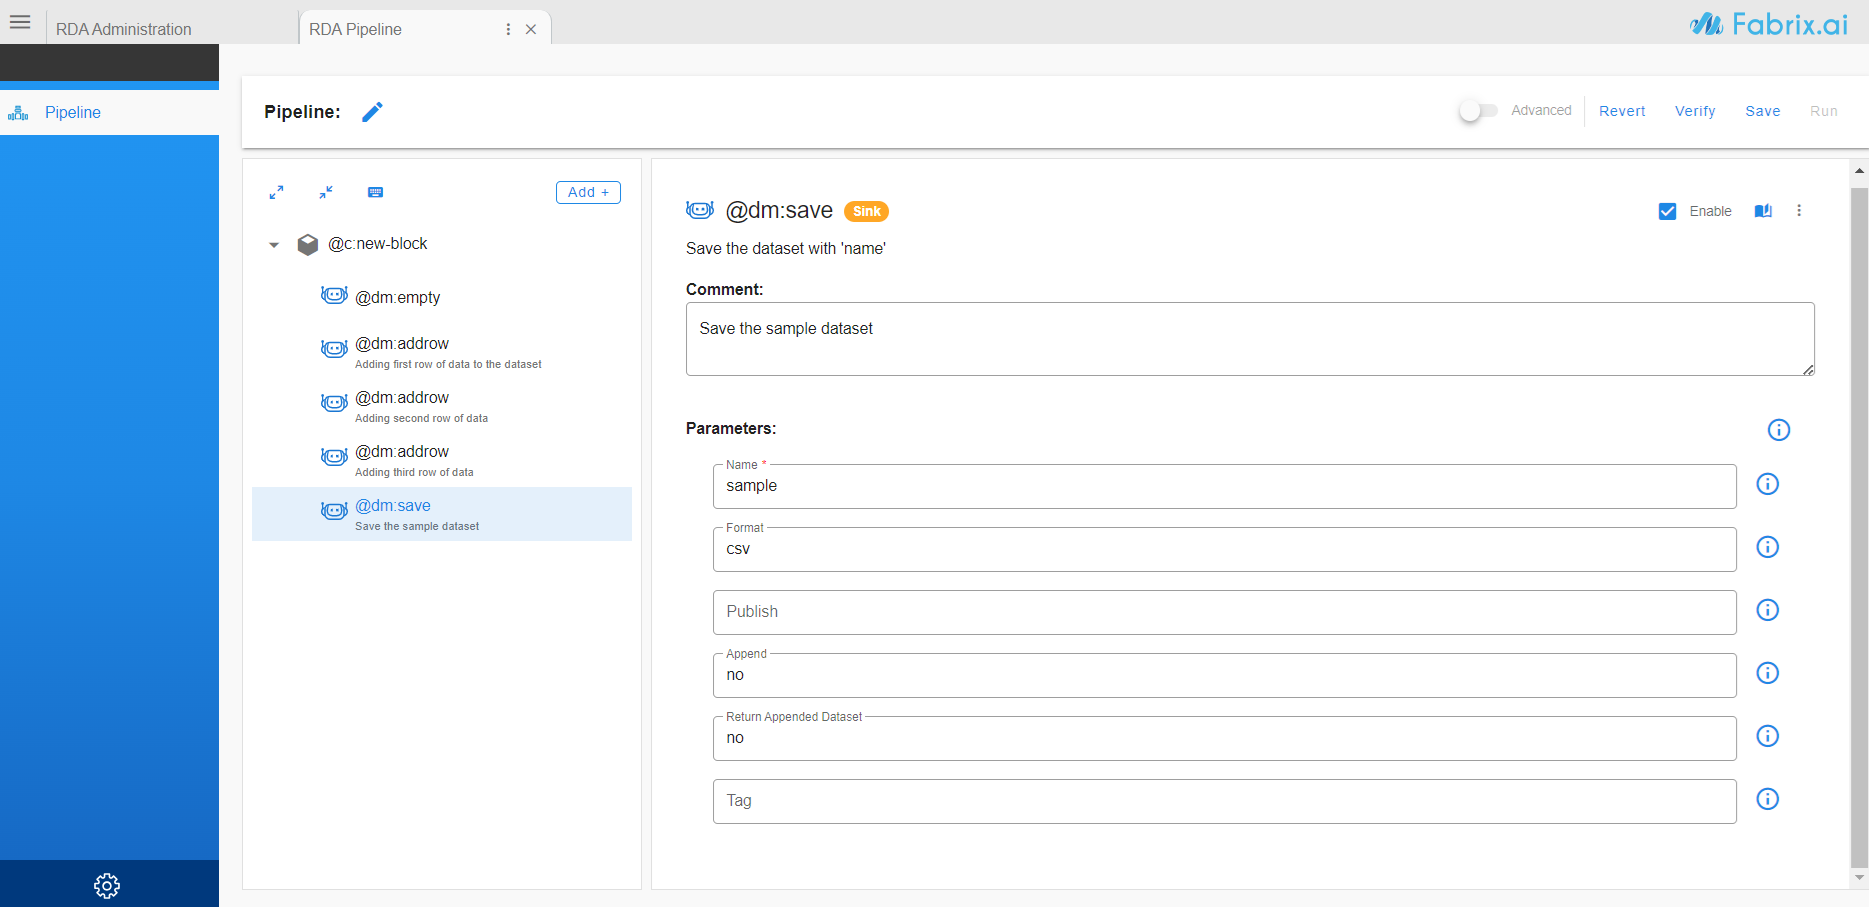
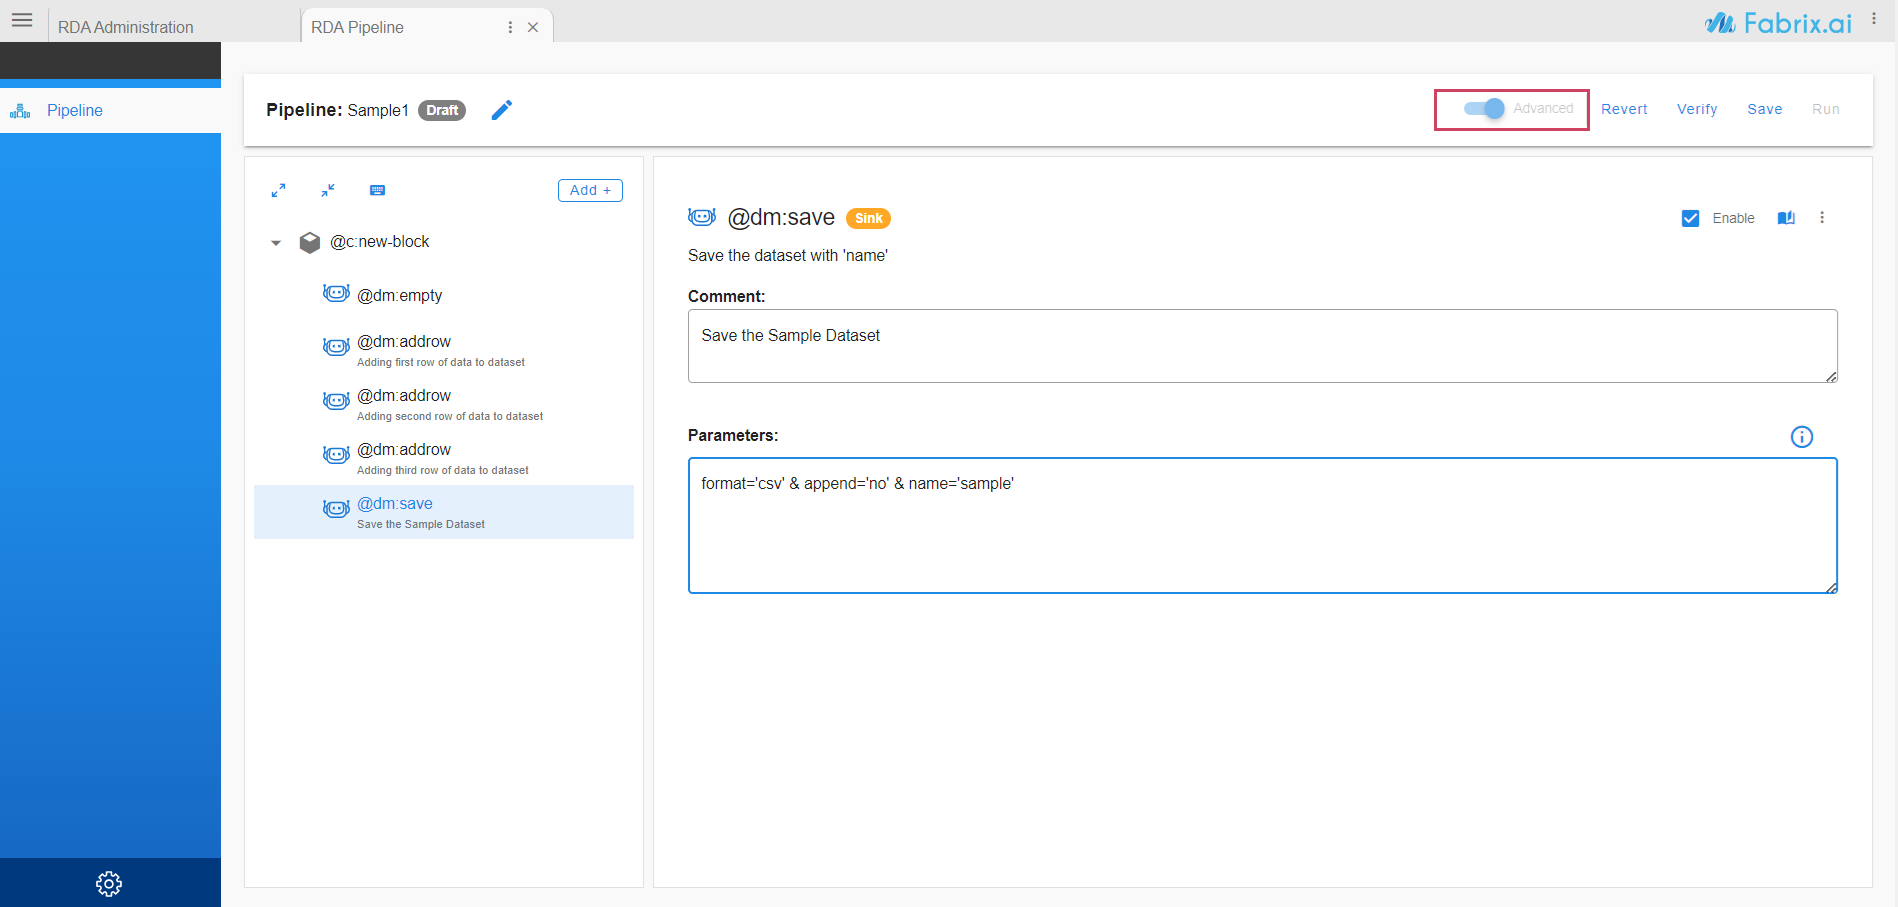
Now lets save the dataset. The bot used to save the dataset is
@dm:save. RDA Stores datasets on Object storage like Minio or S3 or any compatible storage systems. cfxCloud uses built-in object storage by default. If this is an interim dataset, that we do not need to use after the pipeline is finished, we can save it in memory with a prefixtemp:, and RDA will delete the dataset once pipeline execution is complete. -
Refer to documentation about the bot with Reference documentation icon
- Bot information can be entered for each parameter separately
- Or Bot information can be entered as a complete query using Advanced option
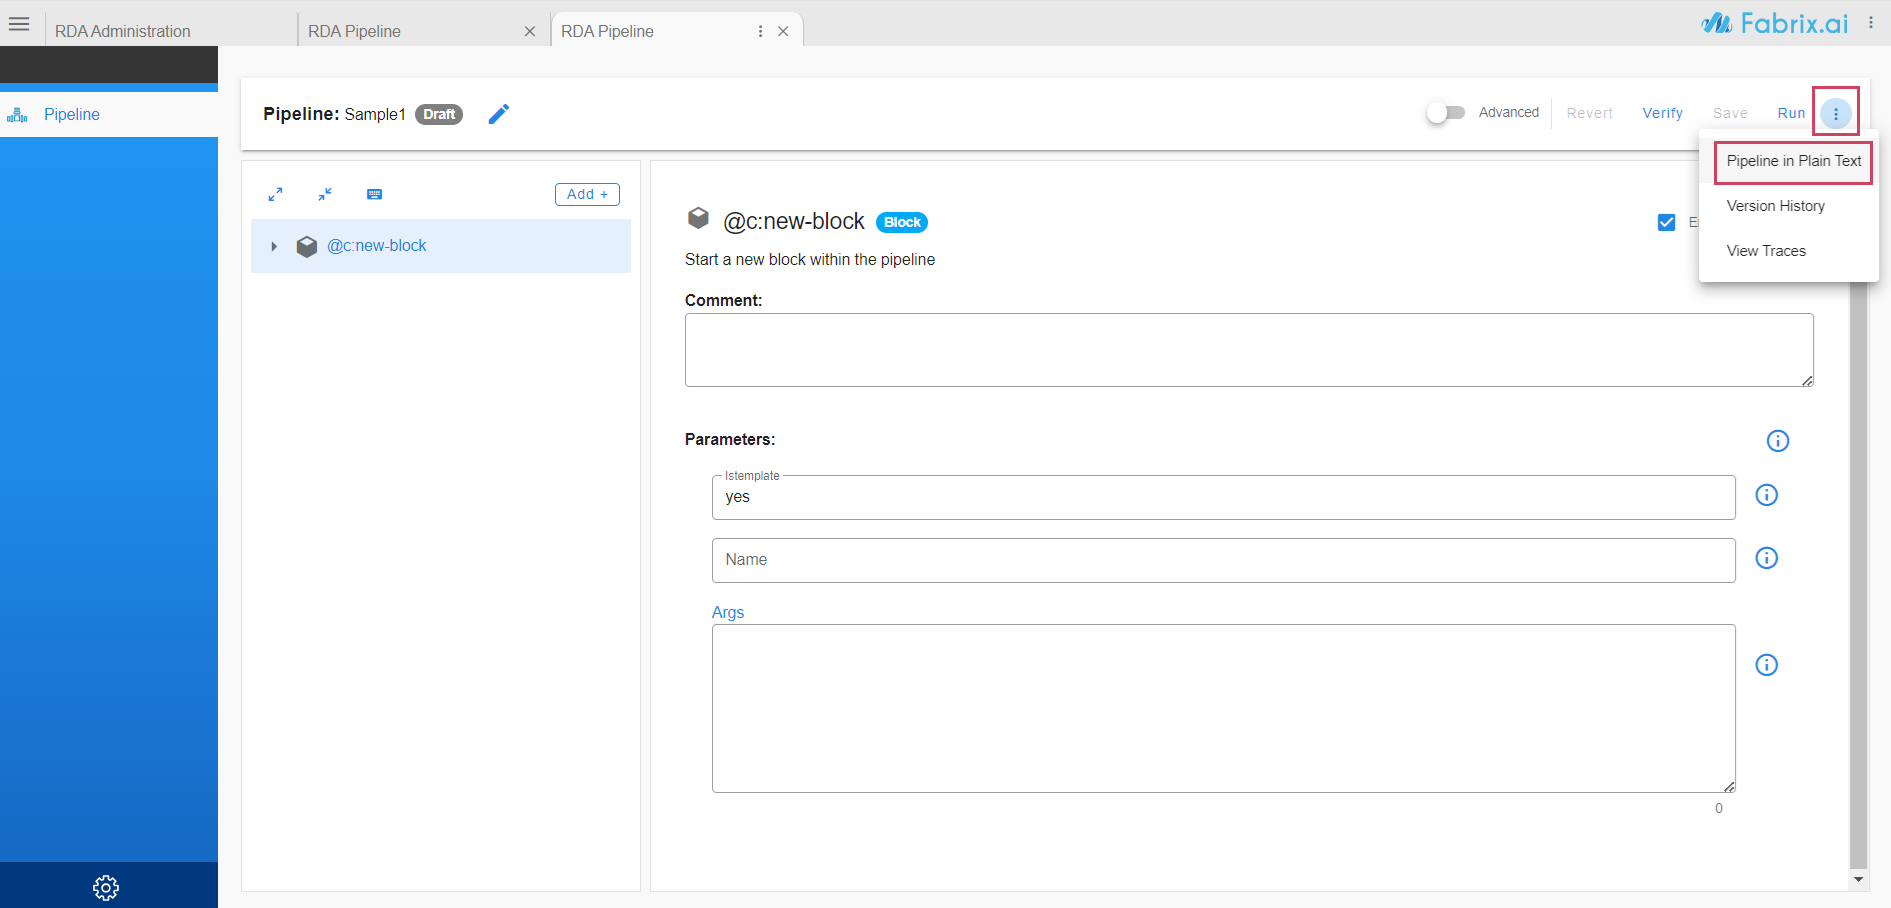
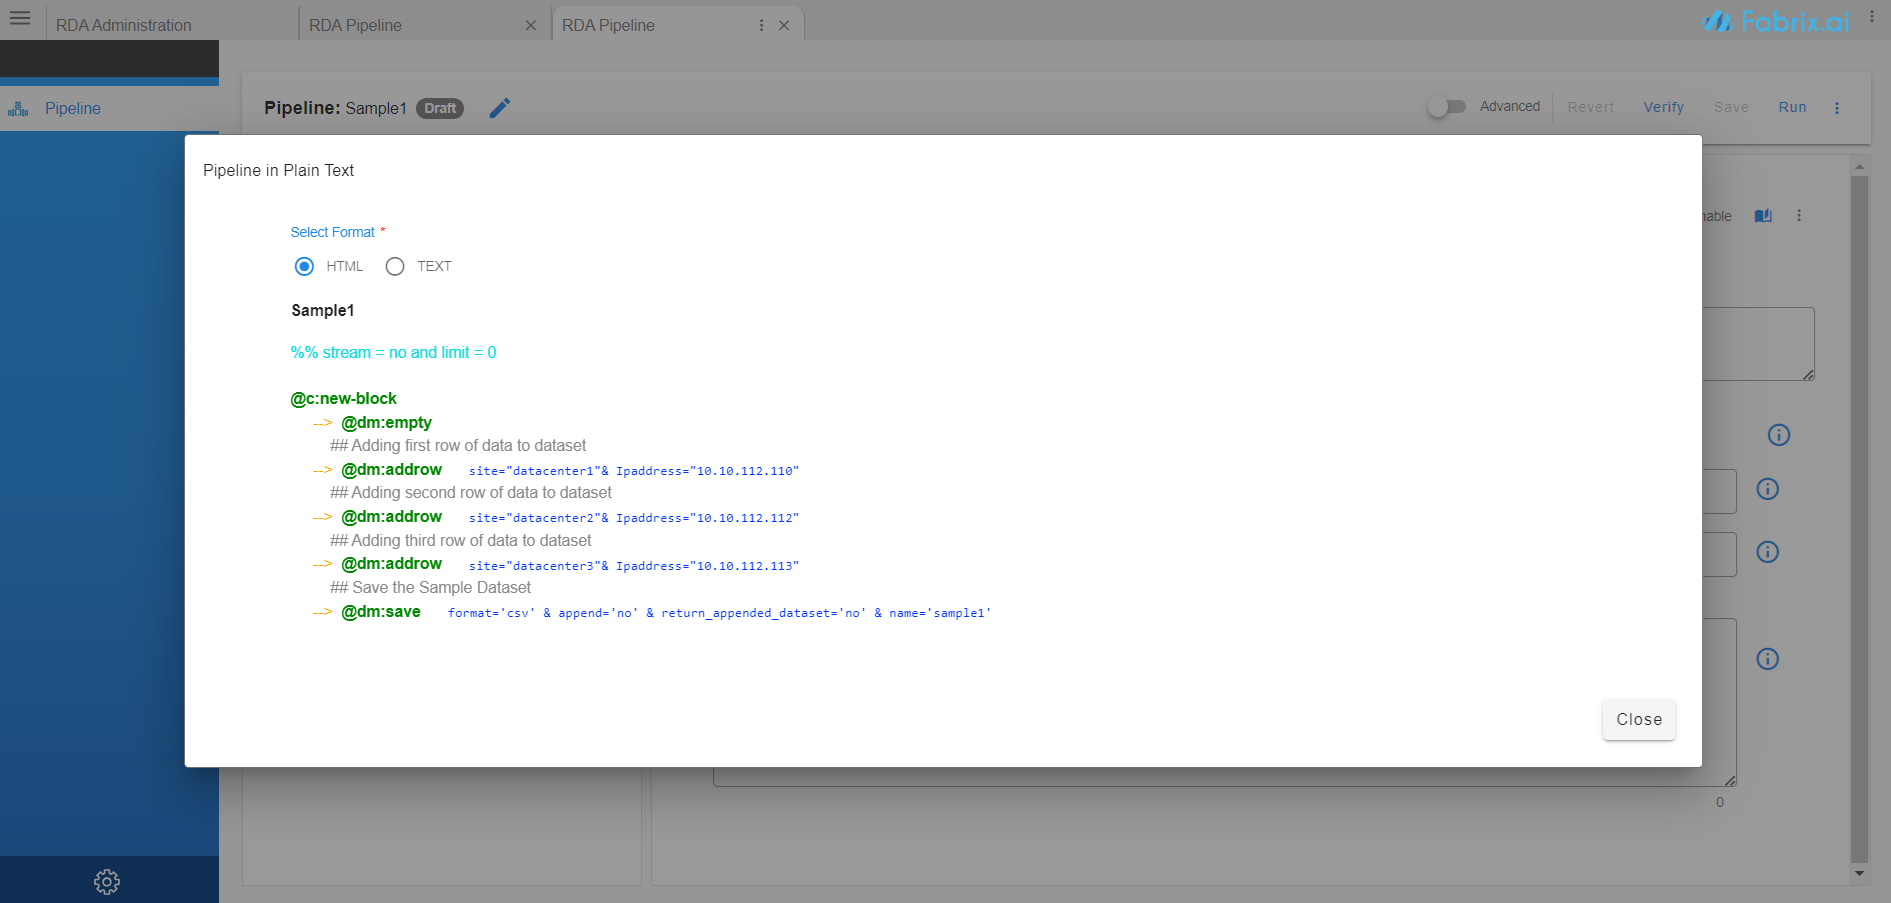
- Click on Pipeline in Plain Text to see pipeline in plain text format
-
Pipeline can be organized in blocks. For easier view, pipeline can be collapsed and expanded.
-
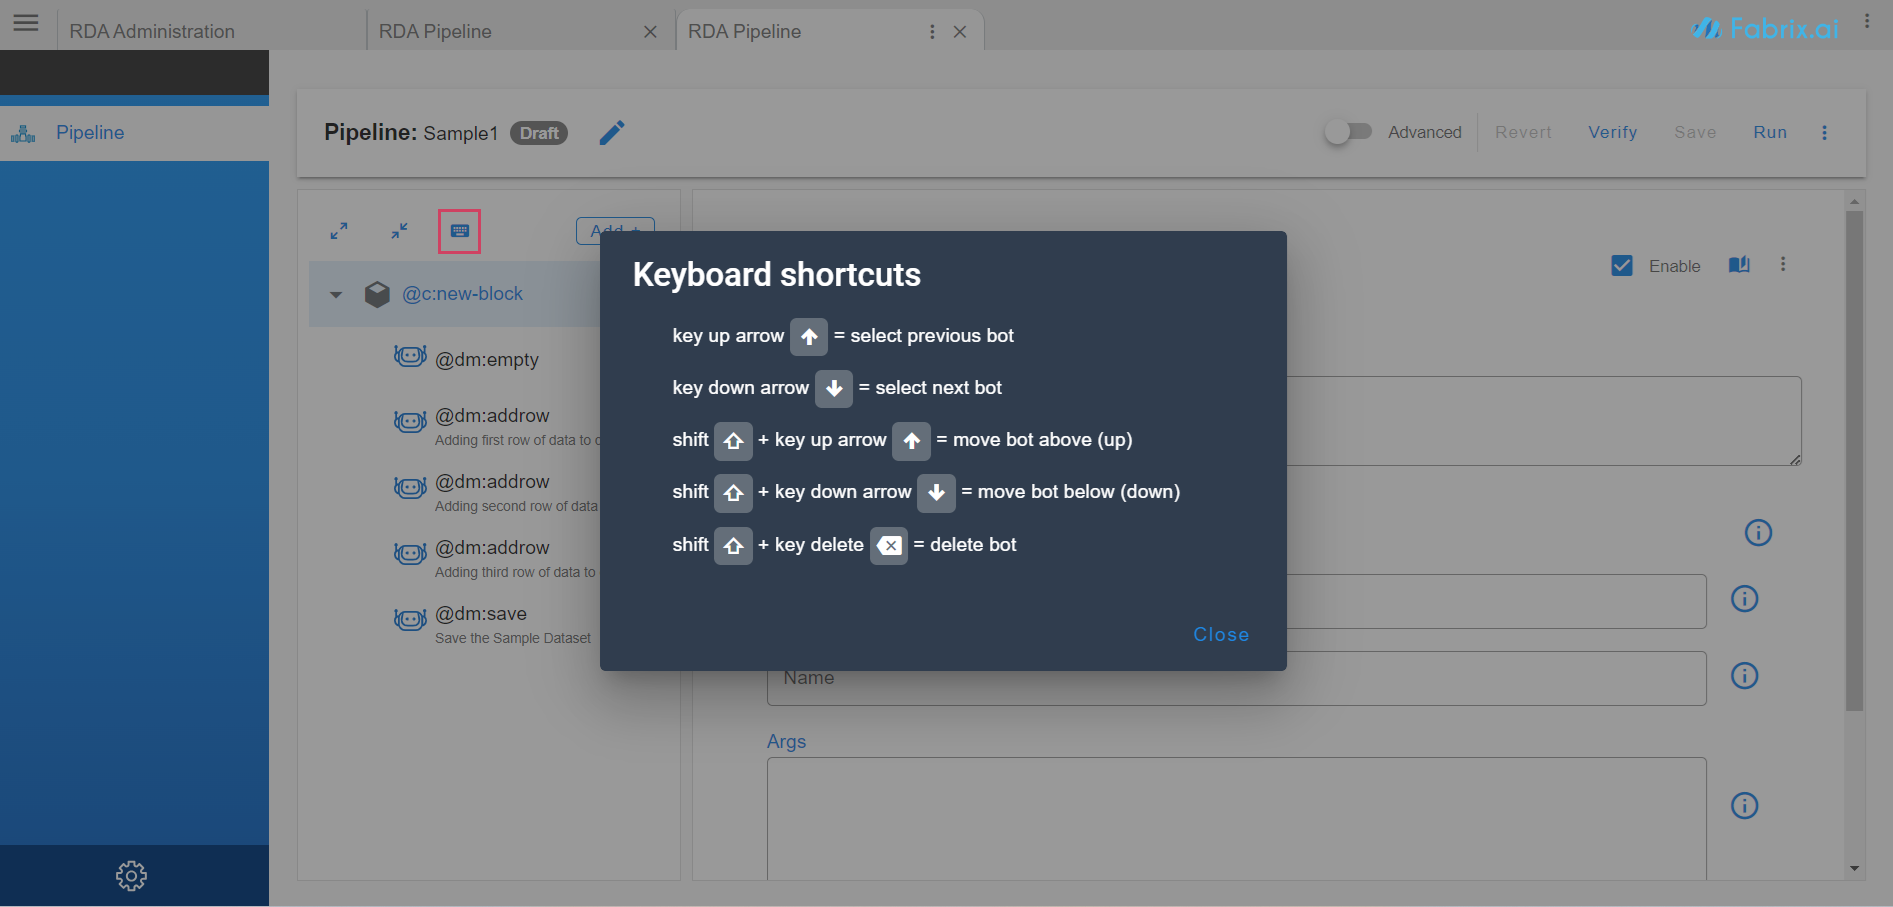
Bots can be dragged up or down either using mouse or keyboard.
-
Enable/Disable a bot in the pipeline. If a bot is disabled, it will not be used for any of the pipeline actions like save/run/verify
-
Pipeline can be saved using Save button on the top right hand side. When a pipeline is saved, it is saved as a Draft Pipeline.
-
To undo any changes done to the pipeline, click on Revert. It will revert it back to last saved version.
-
To verify if pipeline is using correct syntax, available source and sink bots, click on Verify. It will show step-by-step errors in case it fails verification.
-
Once pipeline is verified, to run the pipeline, click on Run. It will run on the worker picked in the pipeline basic information.
-
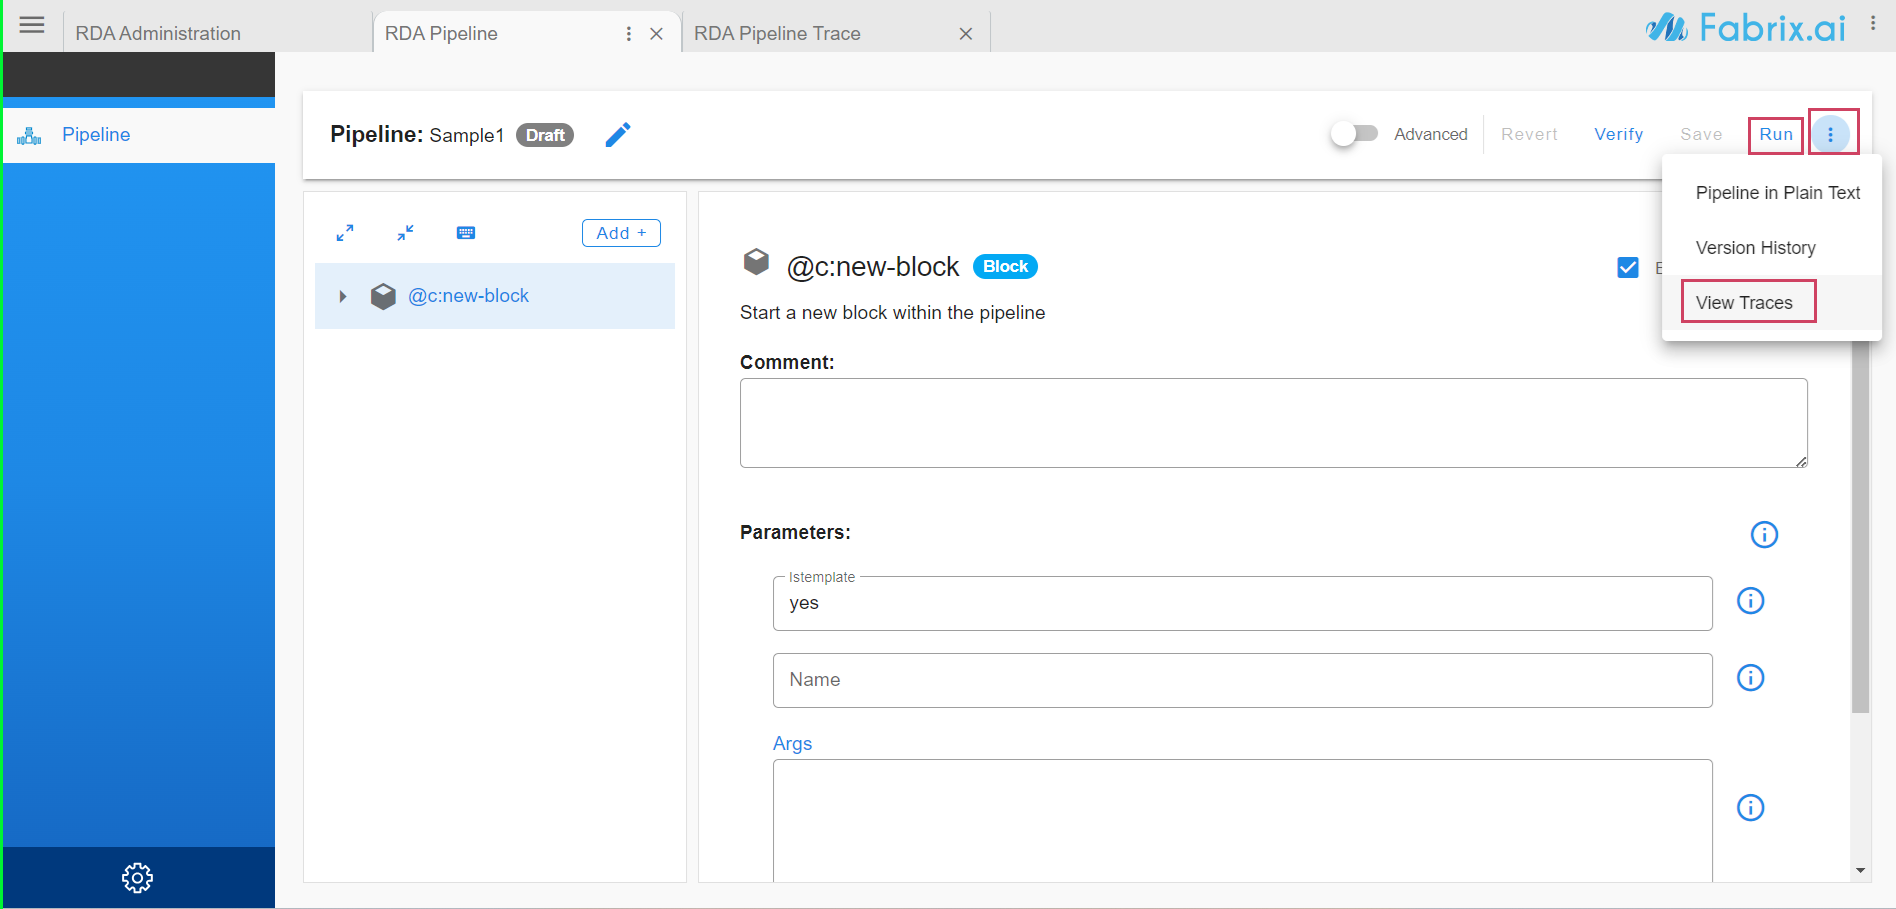
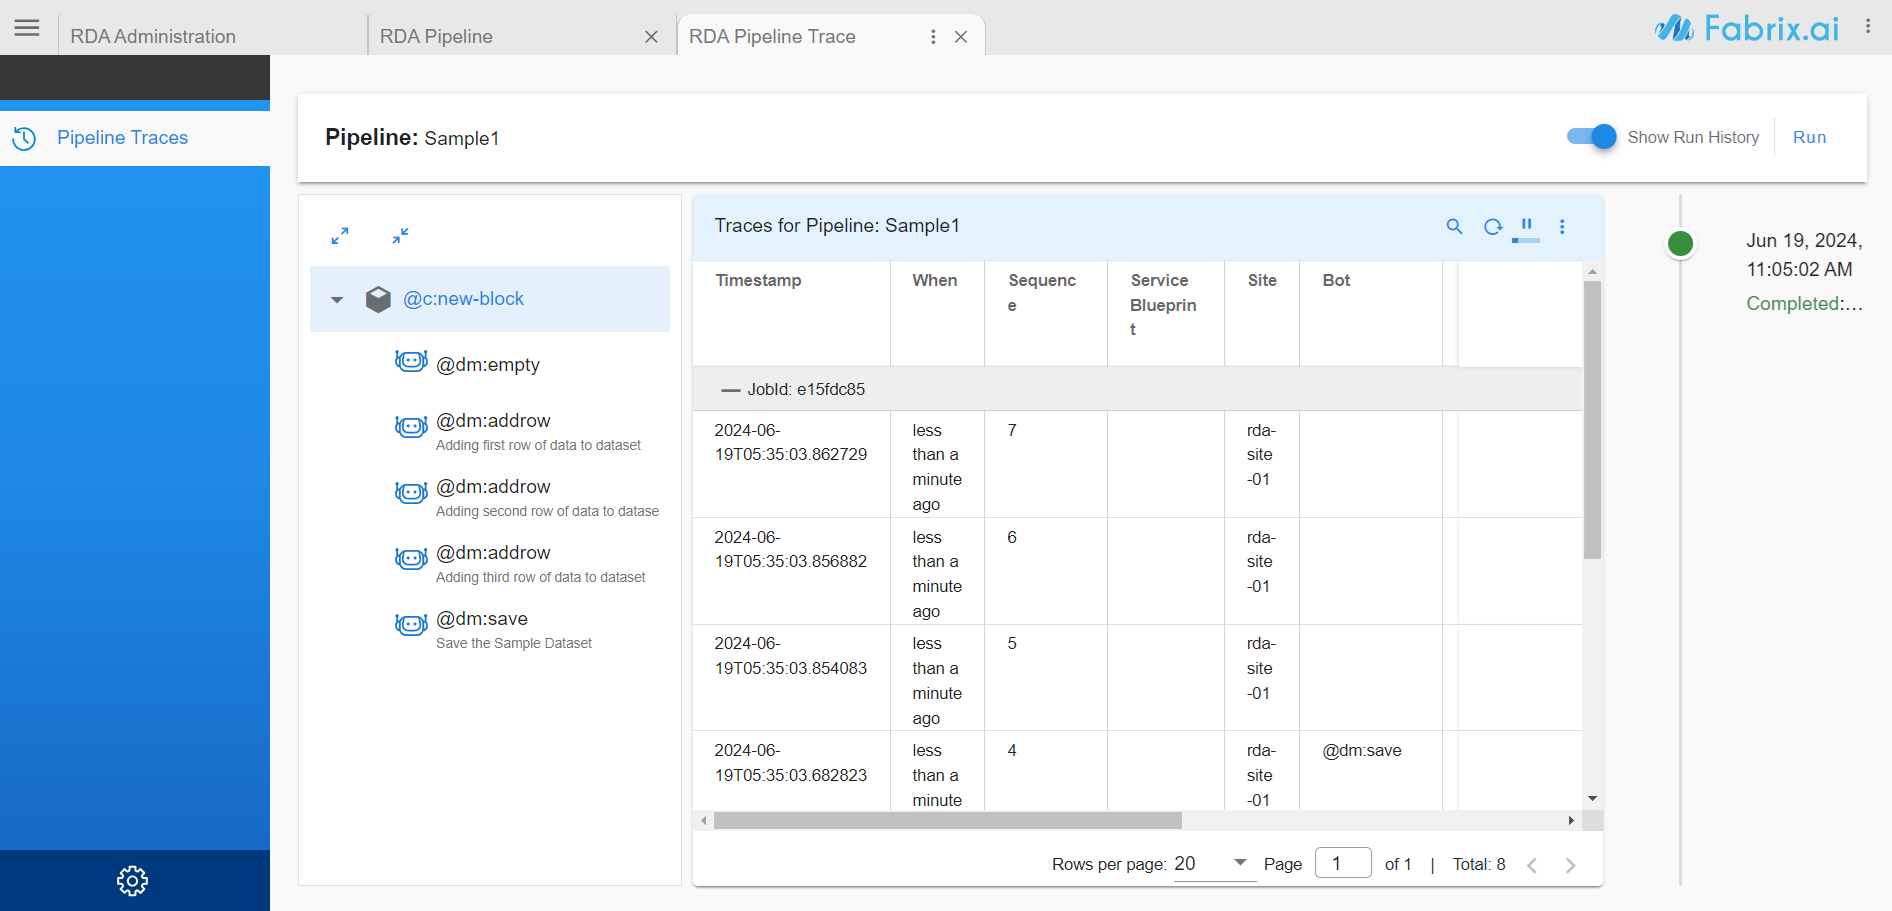
Step by step traces of latest pipeline run can be viewed by clicking on View Traces
-
Click on any bot in left pane of pipeline editor, right side pane highlights the trace for that bot
-
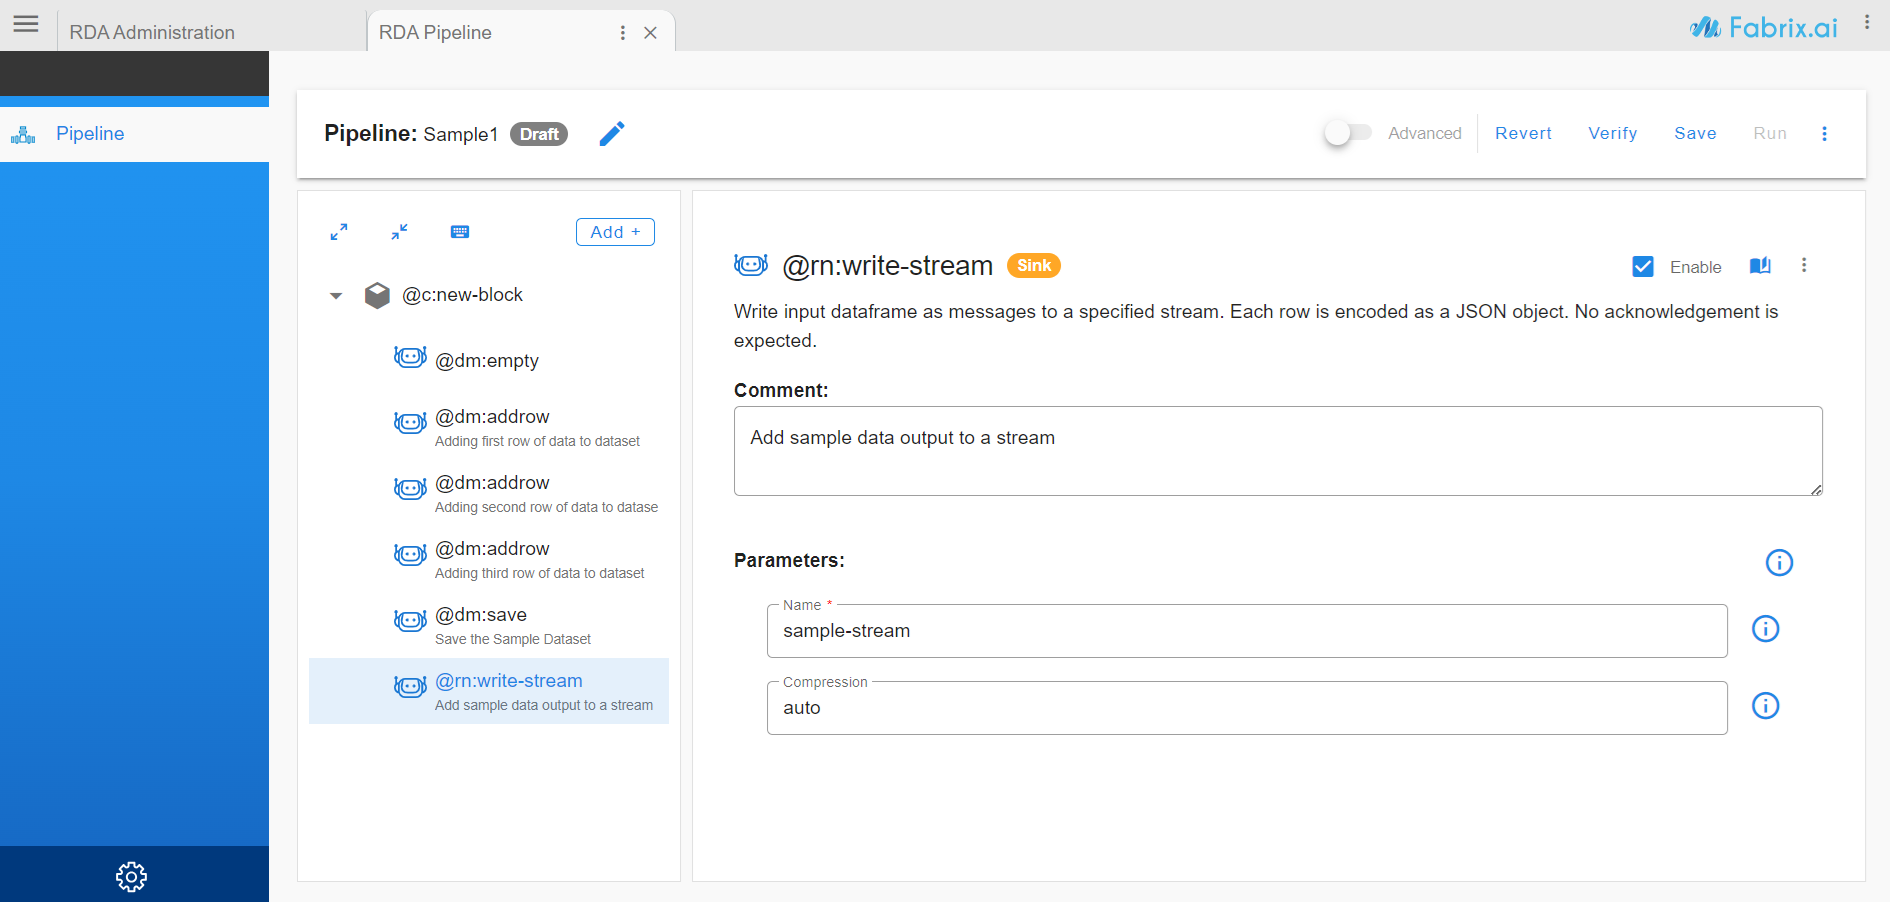
Let's say we want to write the data that we created in pipeline above to a stream. RDA provides powerful and flexible way to move the data between different systems and pipelines using Streaming mechanism. RDA Streams use NATS publish-subscribe to exchange data between different pipelines, possibly running in different cloud environments. In addition to NATS, RDA also supports streaming using other similar technologies like Kafka, MQTT, AWS Kinesis and many more.
-
Data can be written to an RDA Stream by simply using the sink bot
@rn:write-stream. Instead of creating the whole pipeline again, we can edit the Sample pipeline we created above and create a new version of it.
- All versions for a pipeline can be viewed by clicking the Version History on the top right hand side
- To view the run history of the pipeline, go back to Draft Pipelines report and click on action Run History for the pipeline.
-
To look at the step-by-step traces of the pipeline run, go to Draft Pipelines report click on action View Traces.
-
To use a pipeline as part of a Service Blueprint, it is necessary that pipeline is published. Once a pipeline is verified, go to Draft Pipelines report and click on Publish. Once a pipeline is published, it is removed from draft pipelines.
-
When a published pipeline from Published Pipelines report is edited, it is saved again in Draft Pipelines. It has to be published again to use it in Service Blueprint.